Setting up application config
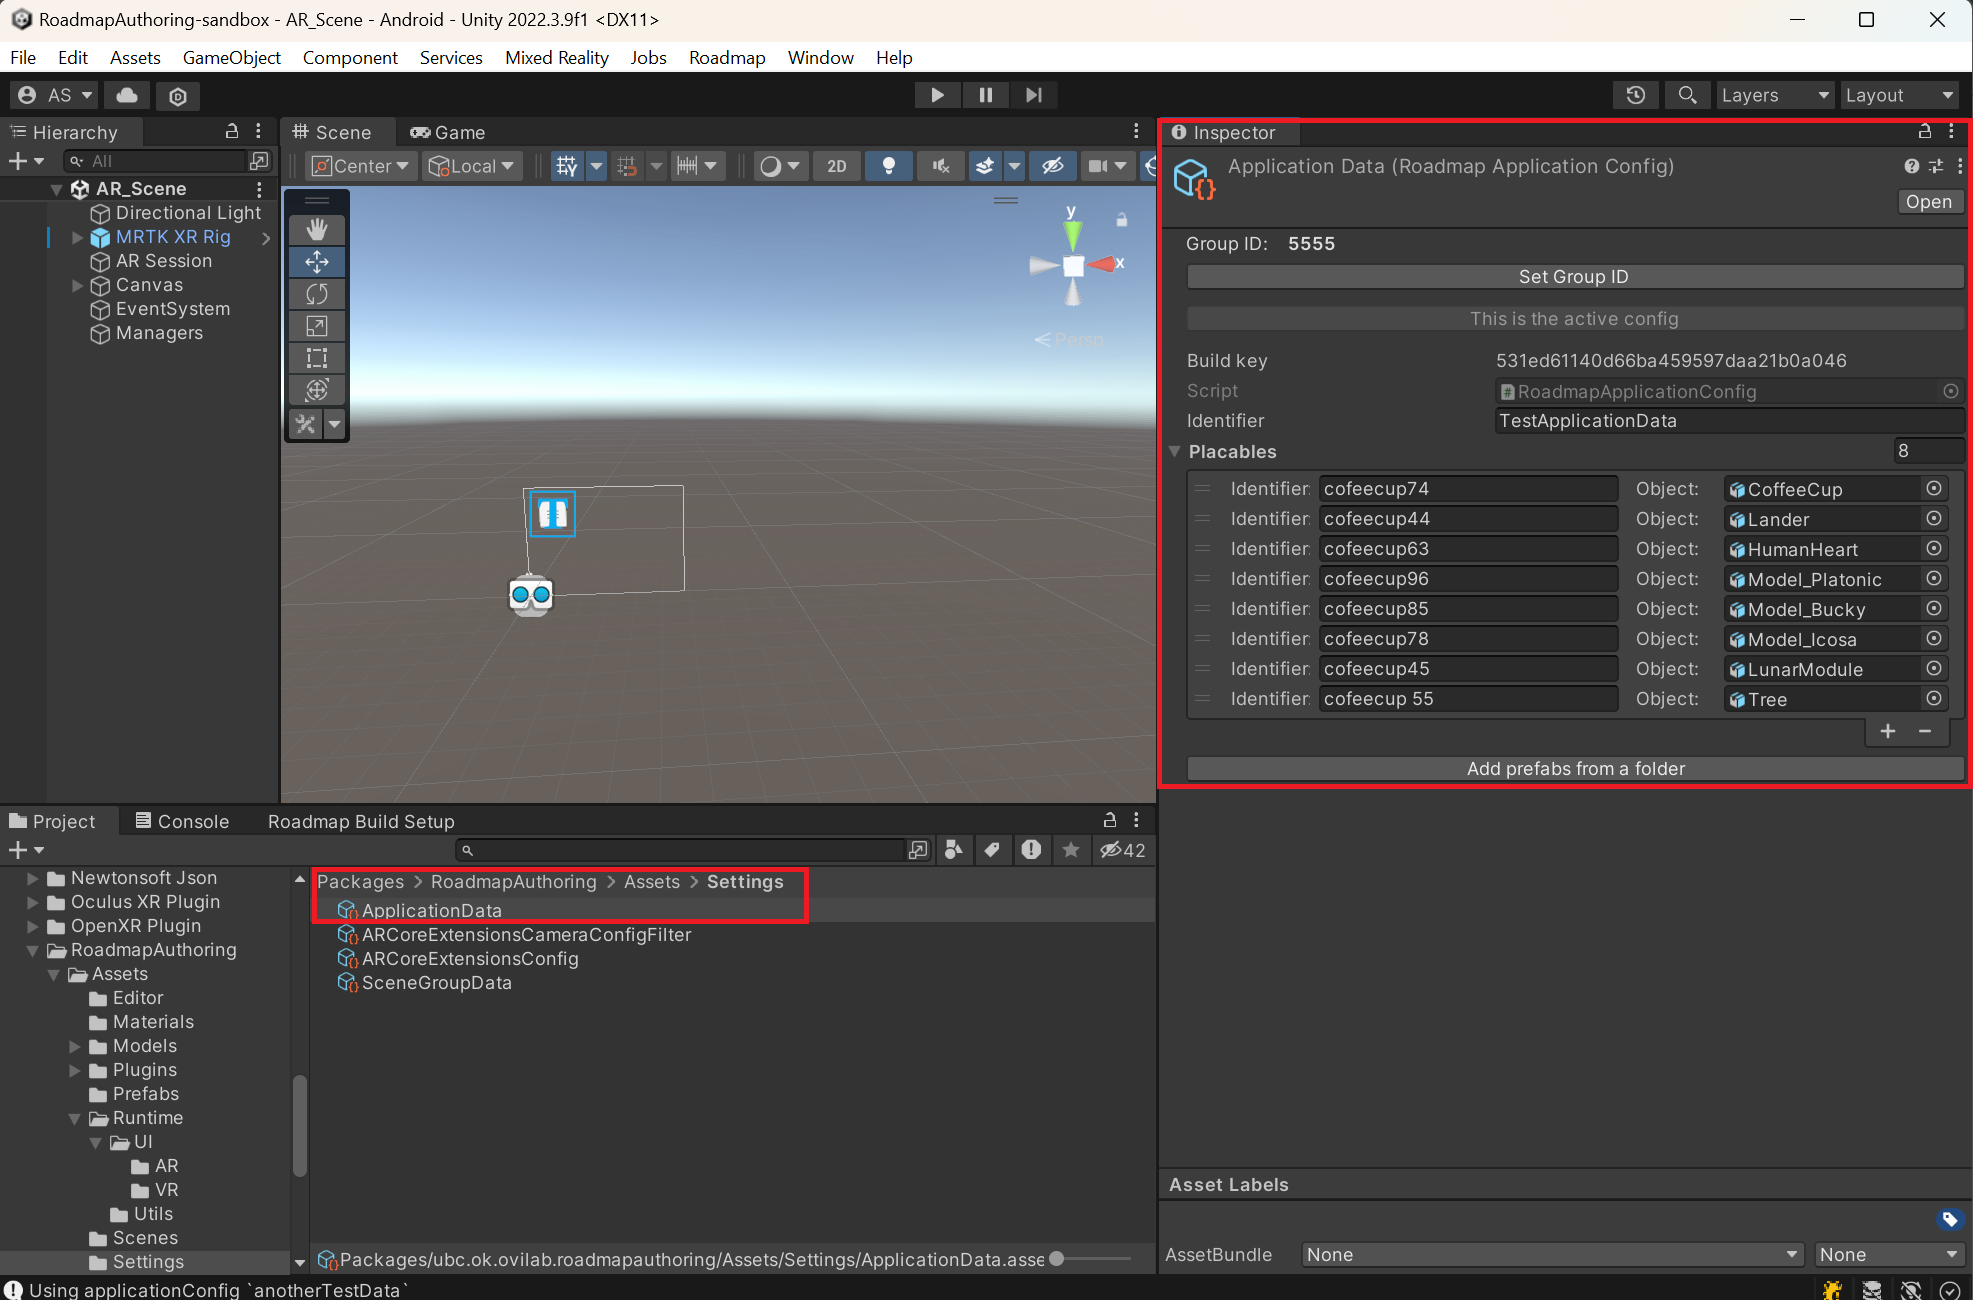
A vital part of the Roadmap package is the application config. Any objects/models (referred to as placeable objects in the roadmap package) you would want to use during the authoring process needs to be registered with the currently made active application config. An example sample config is available with the package in Assets/Settings/ApplicationData.asset
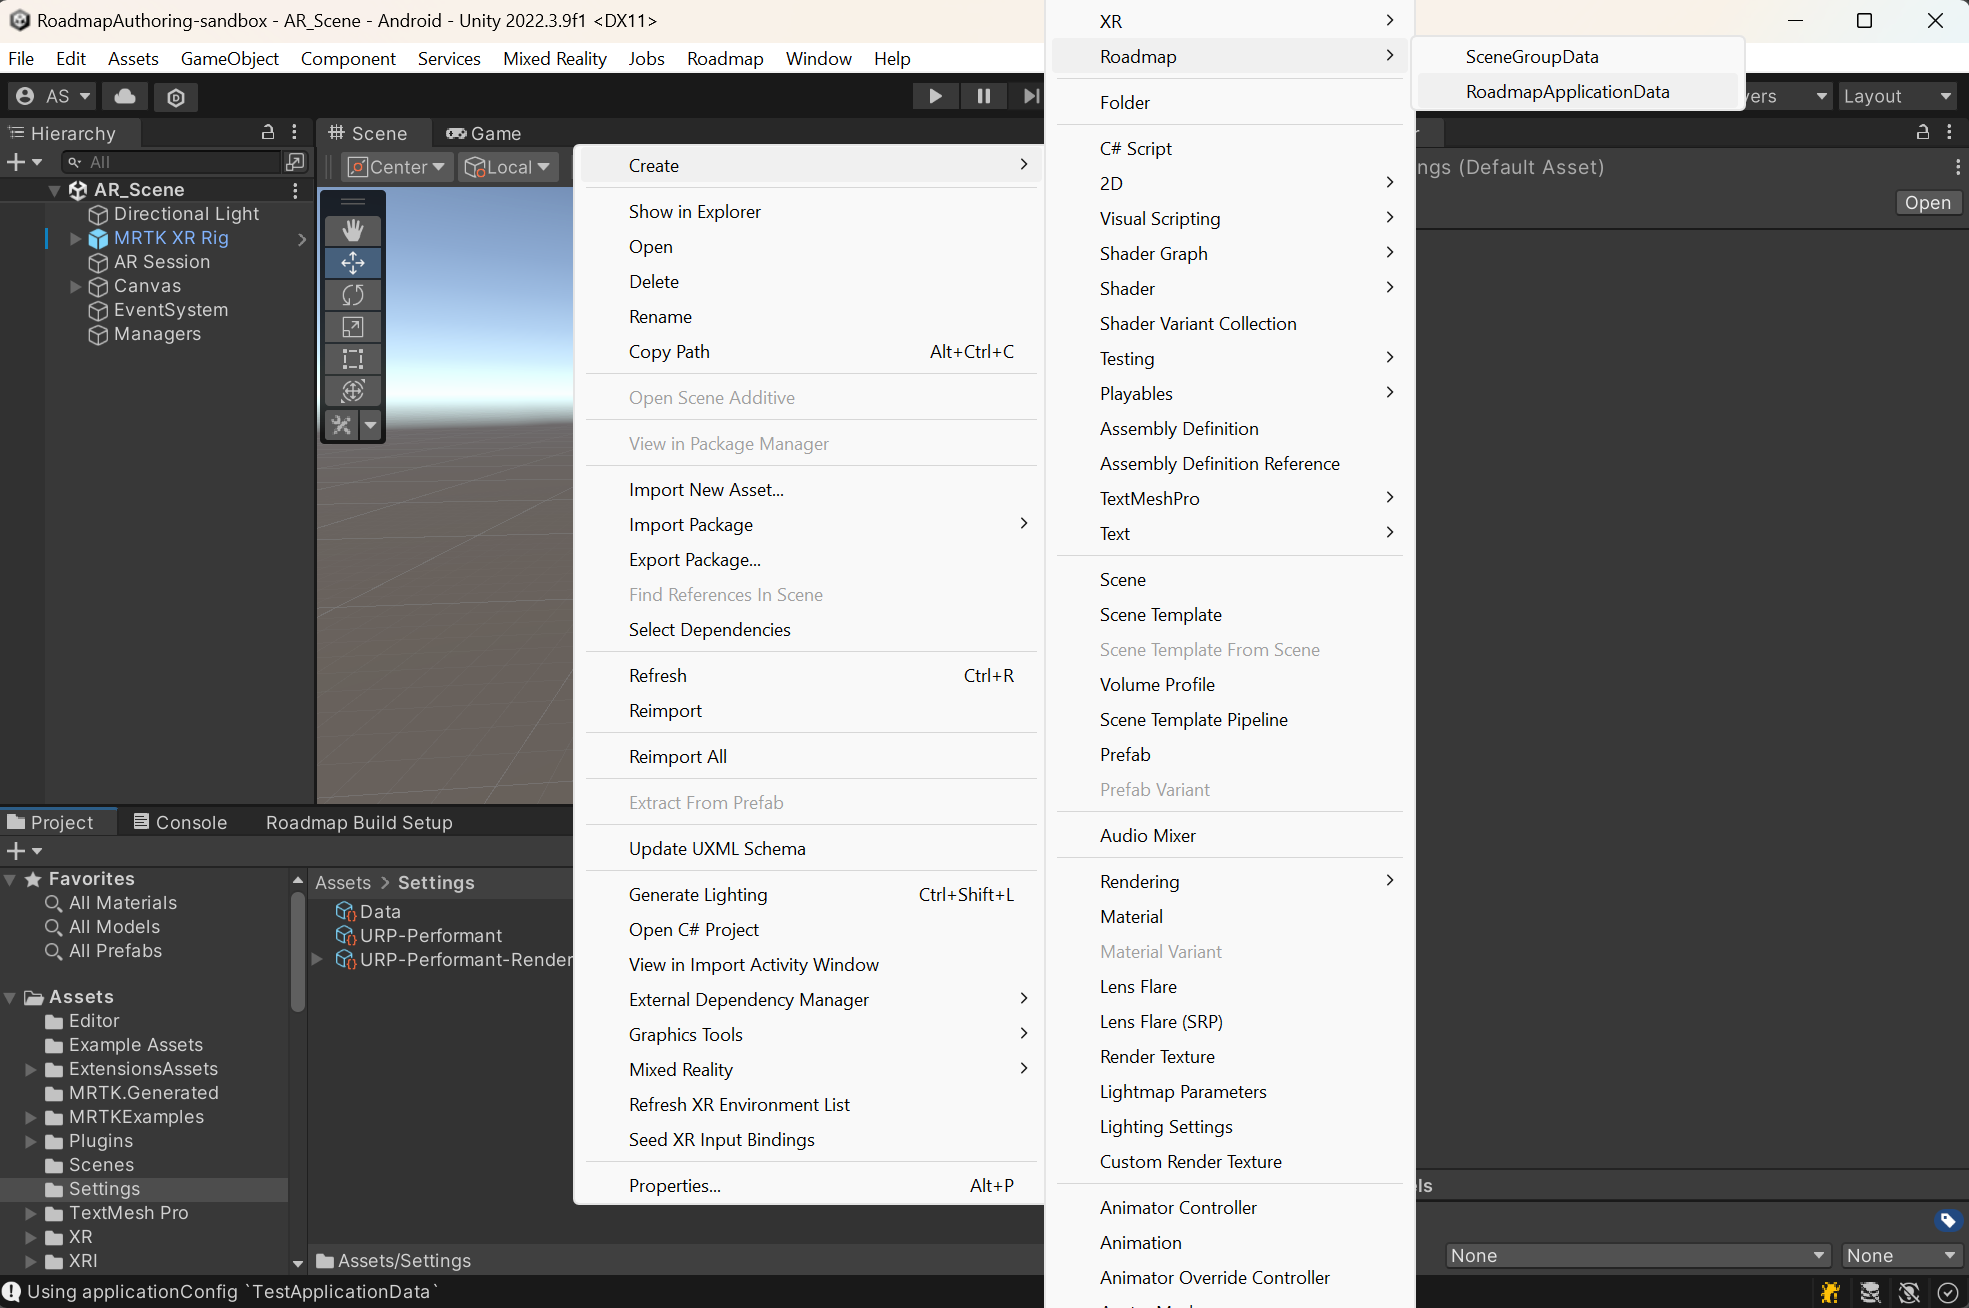
You can create a new application config by right clicking in the project window and selecting Create > Roadmap > RoadmapApplicationData
When you select the newly created application config, you can update the group ID, provide a unique identifier and add any placeable objects. The roadmap application recognizes the application config uniquely with the Build key (which is the GUID of the asset). You may have multiple different application config's within a project. But only one can be set as active. When the project is built, only the active application config is pacakged with the build. To make a config the active one, select the config and click Make this the active config. If the config is already the active config, the button will be deactived. The active config can also be seen in the roadmap build settings window.
Registering new placeable objects
The placeable objects are prefabs or models which can be instantiated in Unity.
NOTE: All synchronization and authoring happens based on the identifier of the object.
You can add/remove models through the inspector of a corresponding config (see above images) under Placeables using the + and - buttons. Each entry in Placeables should have a unique name and the corresponding object. If there are duplicate entries (same identifier used or same prefab used), you will get a warning message and the option to remove duplicates along with the option to fix them.
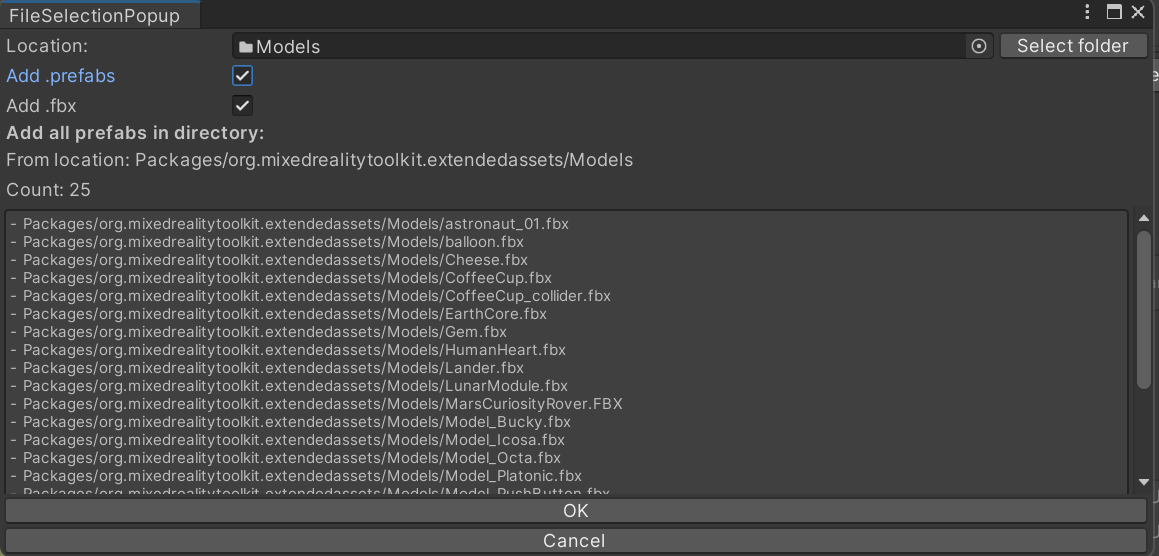
From the inspector you can also bulk add objects. Clicking on Add prefabs from a folder, will open a new window where you can select a folder. It would recursively search the folder and get all objects and list them. To add all the items displayed click on ok, or cancel otherwise. This window currently only looks for files with the extension .prefab and .fbx.
Build and deploy
You can build and deploy the project using the roadmap build setup. Select the appropriate platform, and select Build then Deploy. If you are rebuilding for the same platform, you can use Unities Ctrl + B shortcut. But whenever you are building for a different platform, make sure to select the correct one in the roadmap build setup.
Note that, the application builds the pre-configured scenes shipped with the package, not any of the scenes in the project.
Under the hood, the build setup generates scenes which then built for the given platform. The Reset generated roadmap scenes would reset these scenes to the default values, in case something wrong had happened.
Also, there is a existing bug with the android resolver, which doesn't function correctly now and then. In case you have issues with building (e.g., build stuck on "Building Scene 0..."), you can use the Force resolve android deps option on the build settings which forces this. After that, you may want to consider enabling Auto-resolution (Assets > External Dependancy Manager > Android Resolver > Settings > Auto-resolution)
Authoring scene
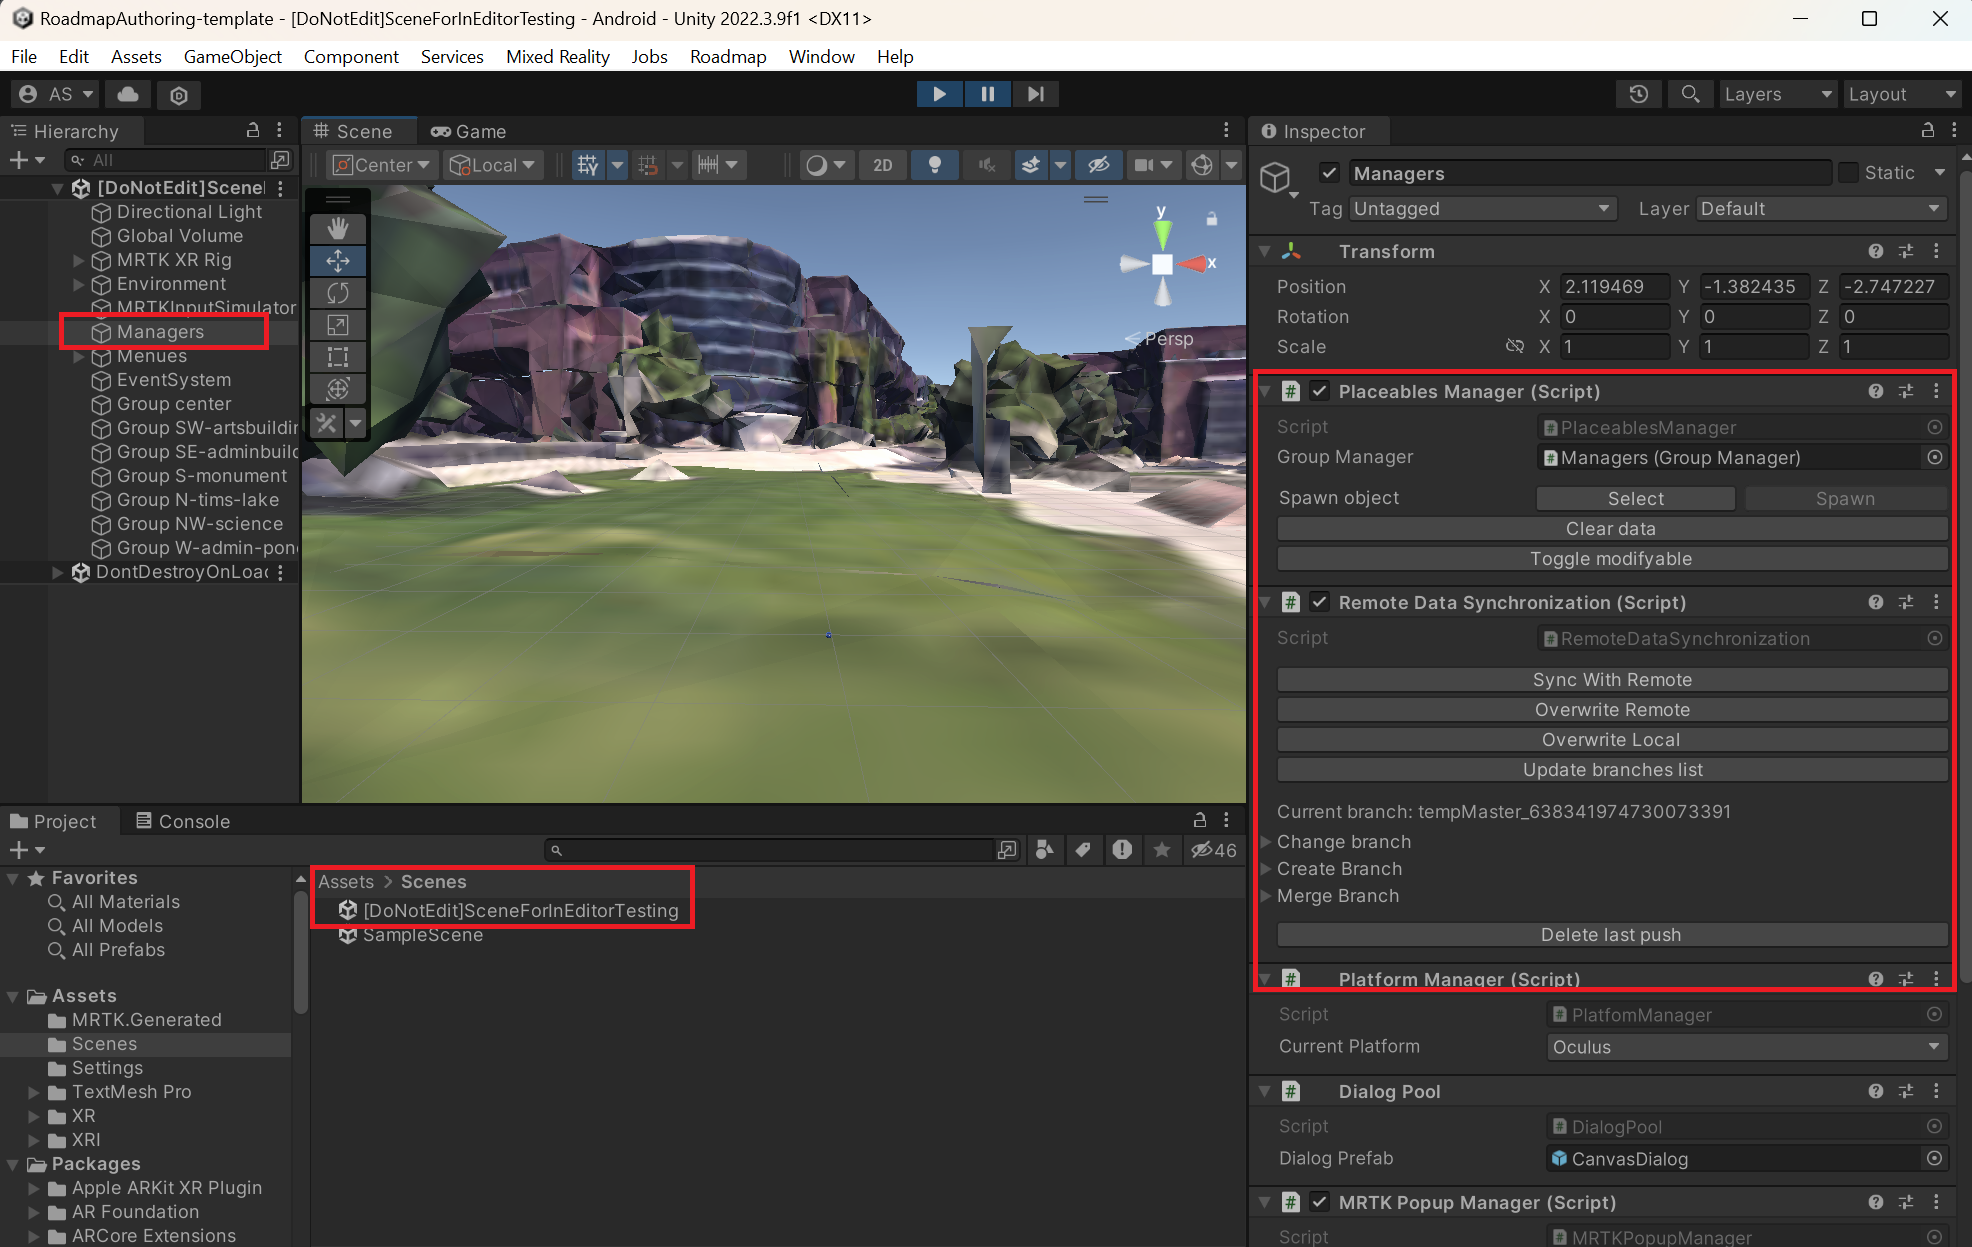
You can author scenes on VR application (Oculus Quest), AR application (Android AR Core) and in editor. For propper synchronization, ensure the applications are built with the same application config activated. To author in editor, make a copy of the VR scene in Assets/Scenes/VR_Scene.unity. The template proejct already has an copy of these scene setup named [DoNotEdit]SceneForInEditorTesting
Menues for authoring
- In editor: Select the
Managersobject in the scene Hierarchy. The menu options appear under thePlaceables Managercomponent and theRemote Data Synchronizationcomponent. Also, you can use the MRTK UI simulator to use the VR menues in editor. Note that this option may not work on Mac OS. - In VR: Look at either palm of the hand, a menu would apper next to the hand. You can interact with this menu with the other hand.
- In AR: Selecting the hamberger menu on the top left would show the menu.
Adding and modifying objects in the scene
Modifications to the scene would be enabled only when in the modifiable state. This is indicated on the VR and AR scene on the menues.
When you select the Add, the list of identifiers of the object in the Placeables from the active application config will be shown. Selecting any one of them would spawn the object in front of the camera. While in the modifiable state, you also can move, rotate, and scale the objects with the handles that appear around the object. To delete an object, select the Delete option in the menues and select the object you want to delete. To delete objects in editor, you may have to use the MRTK input emulation.
Synchronization
Note that with any of the synchrnoinzation options, if there are objects whose prefab/models identifier is not in the application config, it would be removed.
- push/overwrite remote: push the current state of the scene for the current active branch to the remote. Any changes on the remote not in the local scene would be lost. If there is not remote branch, one would get created.
- pull/overwrite local: pull the current state of the scene for the current active branch from the remote. Any changes in the local scene not in the remote would be lost. If there is not remote branch, one would get created.
- Sync - Merge the state of the scene of the current branch with the branches state in the remote. If the remote branch.
- Merge - Merge the state of the current branch with a selected branch and overwrite the local state with the merged result.
- Create branch - Create a new branch.
- Update branch list - Update the list of branches available.
- Change branch - Change to a different branch. Any changes not pushed will be lost.